# Setting the device
Once you install the plugin you will need to add your devices.
After each change to the configuration you will need to restart your Homebridge server to apply the changes.
TIP
Before adding your devices make sure to assign a static IP address for each device on your router.
Subnet/VLAN
Samsung TVs does not allow WebSocket connections across different subnets or VLANs. If your TV is not on the same subnet as Homebridge server it will fail to connect.
# Using Homebridge UI
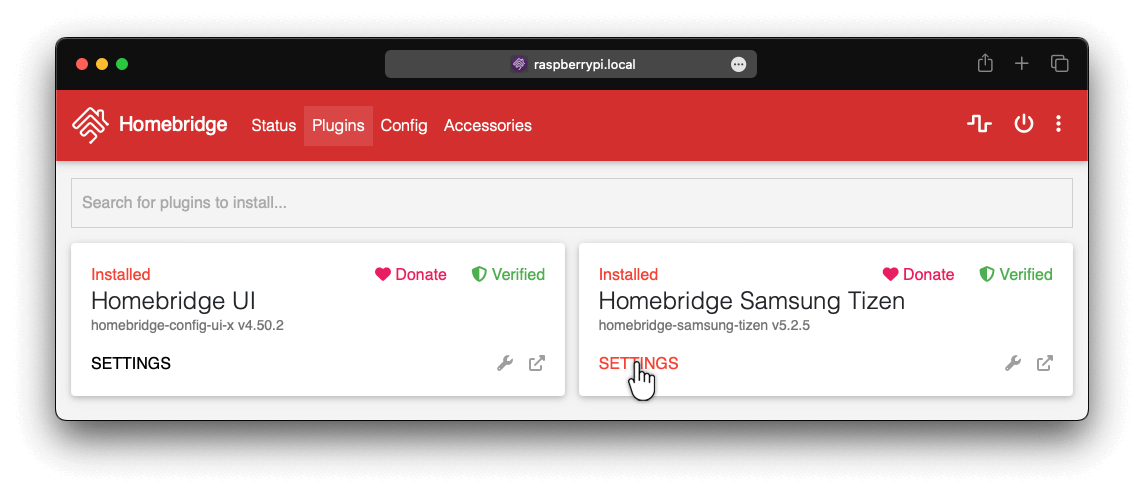
Access the Homebridge UI and select Plugins tab from the navbar.
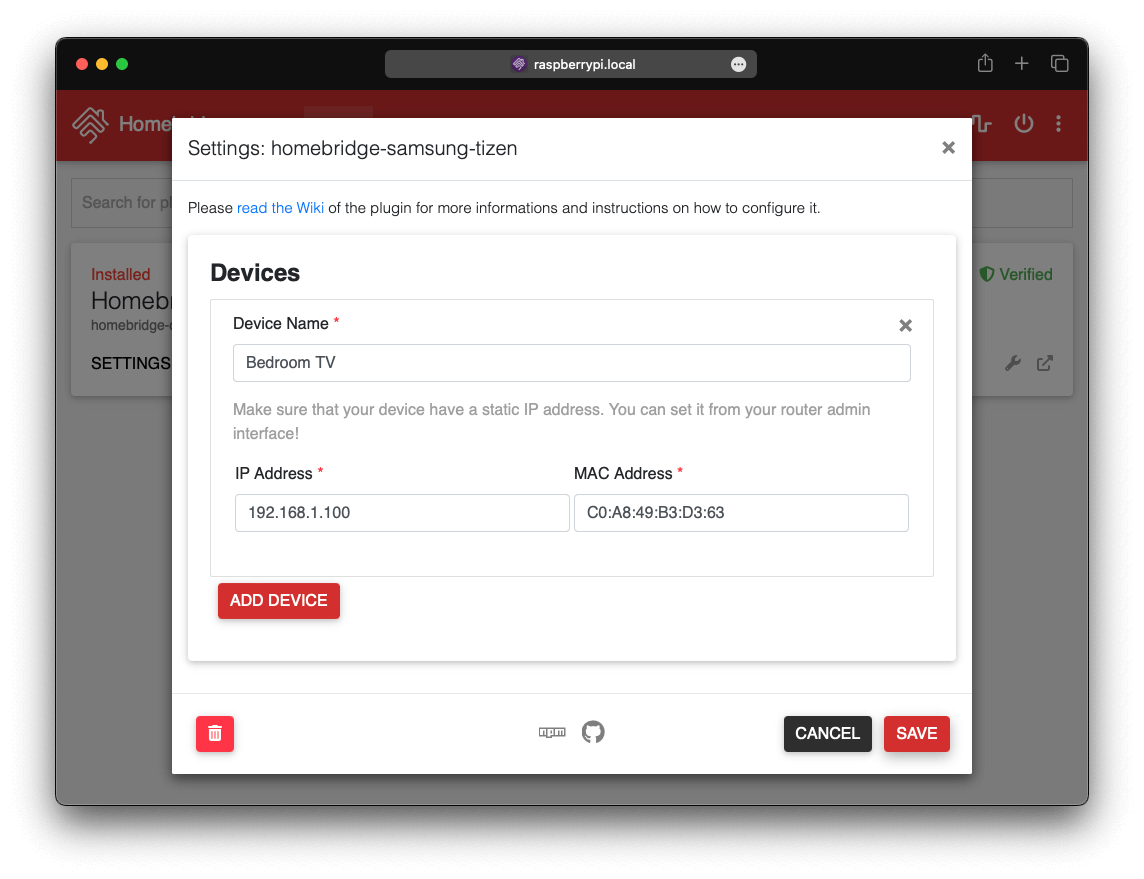
After that click the SETTINGS button on the plugin and a modal will appear.

The minimum configuration for each device are the inputs Name, IP Address and MAC Address. Without one of this the plugin will fail to initialize the device.
You can add multiple devices by pressing ADD DEVICE button for each new device.
After entering your device informations you can click the SAVE button to update the configuration.

Once the configuration was saved you will have to restart Homebridge server to apply the changes.
After the Homebridge server restarts you will have to pair each device. So make sure all your devices are ON. Follow the next page to see how this process is done.
# Manual configuration
If you want to manually set up your devices from config.json file you can do that. I also prefer this method!
You can do this from Homebridge UI by selecting the Config tab from the navbar or by editing the config.json file from the Command Line/Terminal. Usually the file should be found at this location: ~/.homebridge/config.json but this may be different depending on what platform are you using or how you installed Homebridge. If you don't know where your config file is please reffer to Homebridge Wiki (opens new window)
This is just an exaple with basic configuration. For more detailed examples please see the Configuration page.
"platforms": [
    {
        "platform": "SamsungTizen",
        "devices": [
            {
                "name": "Bedroom TV",
                "ip": "192.168.1.100",
                "mac": "C0:A8:49:B3:D3:63"
            }
        ]
    }
]